Airbrushing Basics for Scale Models
A Smoother Finish, One Controlled Pass at a Time
You’ve seen the results: smooth aircraft camouflage, even paint on a tank hull, and subtle changes in color that make a scale model feel more convincing. An airbrush can help you achieve those finishes, but the first time you pick one up, the equipment may look more complicated than the painting itself.
What pressure should you use? How thin should the paint be? How far should you hold the nozzle from the model? And why does paint sometimes sputter, dry before it reaches the surface, or collect in tiny puddles?
The answers become much easier once you understand how an airbrush works. You don’t have to master complex camouflage on your first day. Start with a reliable setup, learn to control the trigger, practice with a simple color, and work your way toward finer effects.
This DMC guide covers your first airbrush setup, safe spraying, paint preparation, air pressure, basic passes, cleaning, and the most common problems beginners encounter.
What Does an Airbrush Actually Do?
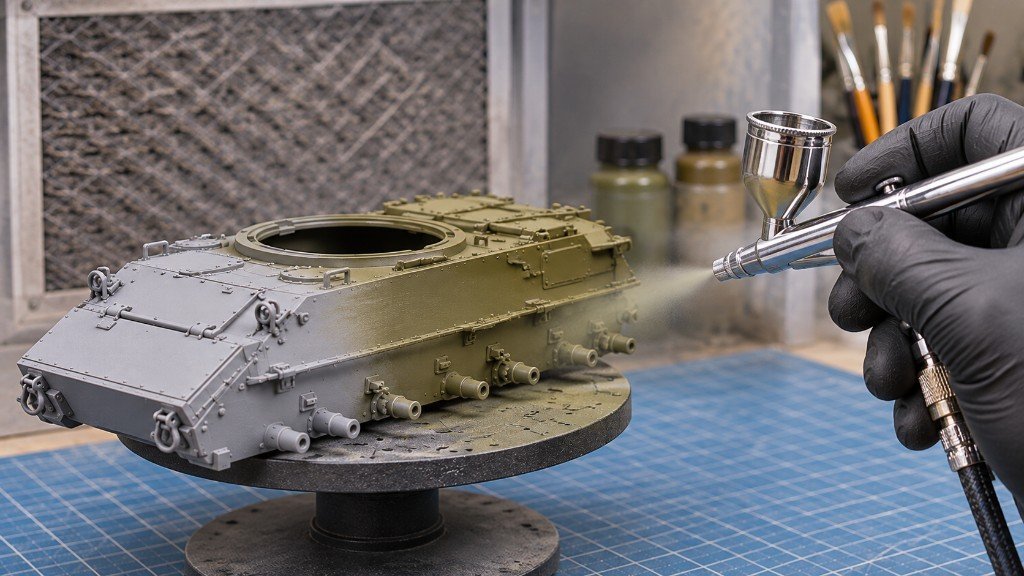
An airbrush uses compressed air to break liquid paint into very small droplets and direct them toward a surface. By adjusting the amount of paint released, the air pressure, and your distance from the model, you can create anything from a broad, soft coat to a narrow line.
For scale modeling, that makes an airbrush especially useful for:
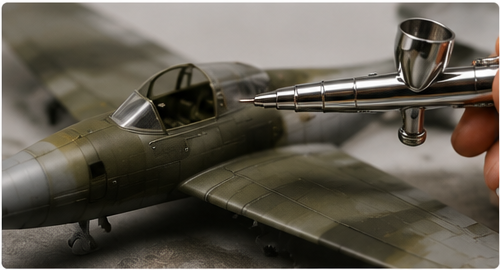
- Applying thin, even base colors over aircraft wings, vehicle hulls, and other large surfaces.
- Keeping panel lines, rivets, grilles, and molded detail visible.
- Creating soft-edged camouflage and gentle color transitions.
- Applying compatible primers and clear coats with greater control than many aerosol cans.
- Building subtle highlights or shadows as your skills improve.
An airbrush doesn’t replace traditional brushes. You’ll still want paintbrushes for tools, road-wheel tires, cockpit controls, tiny trim, and touch-ups. Think of the airbrush as another tool on the workbench, not a requirement for every part of a model.
Choosing Your First Airbrush
Airbrushes come in several configurations. Understanding the basic differences will make choosing, borrowing, or learning to use one much less confusing.
Gravity Feed, Siphon Feed, and Side Feed
Gravity feed: The paint cup sits above the airbrush, allowing paint to feed downward. This arrangement usually works well for small amounts of paint and detail work. It is a popular general-purpose choice for scale modelers.
Siphon or bottom feed: Paint is drawn from a container mounted beneath the airbrush. It can be convenient when spraying larger amounts or changing between prepared paint bottles, but it may require a different setup and cleaning routine.
Side feed: The cup mounts to the side, which can help with certain viewing angles or specialized work. It isn’t necessary for most beginners.
Single Action Versus Dual Action
A single-action airbrush generally uses the trigger to control airflow while paint flow is adjusted separately. It can be straightforward for consistent coverage.
A dual-action airbrush lets you control both air and paint with the trigger. On a typical design, pressing down starts the air and pulling back increases paint flow. That extra control is useful for moving from broad coats to finer work.
What About Needle and Nozzle Size?
Needle/nozzle combinations influence the type of paint and spray pattern an airbrush can handle. As a practical general-purpose starting point, many modelers use a mid-sized setup around 0.3–0.5 mm, depending on the manufacturer and the type of work.
Very small nozzles can produce fine work but may be less forgiving with thicker paint or larger pigments. Very large setups can be useful for broader coverage but aren’t necessary for typical model kits.
The Basic Airbrushing Workstation
You don’t need an elaborate workshop, but you do need a few components that work together.
| Equipment | Why It Matters | What to Look For |
|---|---|---|
| Airbrush | Applies the paint | Comfortable trigger, suitable nozzle, parts and instructions available |
| Compressor | Supplies steady air | Adjustable regulator; a tank can help provide consistent airflow |
| Moisture trap | Reduces water entering the air line | Properly installed and checked, especially in humid conditions |
| Compatible hose and fittings | Connects the equipment | Correct threads, secure connections, no air leaks |
| Appropriate spray area | Captures overspray | Ventilation and equipment rated for the coatings being used |
| Suitable respiratory protection | Addresses inhalation hazards | Selection based on the paint’s particles, vapors, and safety instructions |
| Paint, approved thinner, and cleaner | Supports spraying and cleanup | Products compatible with one another and with the airbrush |
| Test surface and model holder | Helps you practice without risking your model | Spare styrene, test cards, clips, or a turntable |
Why a Regulator and Moisture Trap Matter
A regulator lets you adjust the pressure supplied to the airbrush. A moisture trap helps prevent condensed water from traveling through the hose and landing on your paint job.
If your compressor has a tank, drain collected moisture and maintain it according to its manual. Check that hose connections are secure and that the pressure remains steady when air is flowing.
Do You Need a Spray Booth?
A properly designed, suitable spray booth can help capture overspray and reduce airborne contaminants. But not every inexpensive hobby booth is safe for every coating, especially flammable solvent-based paints.
That distinction matters enough to deserve its own section before you begin spraying.
Spray Safety Comes Before the First Coat
Airbrushing creates a fine mist that can be inhaled. That remains true when the label says water-based or when the paint has relatively little odor. Solvent-based products may introduce additional vapor and fire hazards.
Before airbrushing:
- Read the paint and thinner labels. Check the safety data sheet when available, including ventilation, exposure, and flammability instructions.
- Use suitable ventilation. A local-exhaust spray area that captures the mist and vents safely outside is preferable to allowing overspray to circulate through a room.
- Choose protection for the actual hazards. Airborne paint particles and solvent vapors require different respiratory filtration. Follow product guidance and applicable respirator selection and fit requirements.
- Verify equipment compatibility. Never assume a hobby spray booth, fan, or electrical equipment is suitable for flammable solvents. Use equipment specifically rated for the materials involved.
- Protect the surrounding area. Keep bystanders, children, pets, food, ignition sources, and unrelated items away from the spraying area.
- Handle waste responsibly. Collect used cleaners and paint residues and dispose of them according to the product and local requirements.
A simple disposable dust mask does not protect against organic solvent vapors. Respiratory protection is also not a substitute for adequate ventilation.
If you cannot establish a safe environment for spraying your chosen product, do not spray it indoors. Brush painting with a suitable product may be the better option for that session.
Learn the Trigger Before Adding Paint
For a typical dual-action airbrush, the trigger controls two separate things:
- Press down: Starts the airflow.
- Pull back: Adds paint and increases the amount released.
Pushing the trigger forward reduces paint flow. Releasing upward stops the air.
A useful beginner sequence is:
- Press down for air on.
- Begin moving the airbrush across your practice surface.
- Pull back gently for paint on.
- At the end of the pass, push forward for paint off while keeping the air flowing.
- Release the trigger for air off.
This helps reduce the chance of leaving a blob at the beginning or end of a stroke. It also teaches you to think about when paint starts and stops, not just where the airbrush points.
Practice the trigger motion with the airbrush safely set up before attempting a detailed paint job. Use a suitable test medium and surface; spraying water may help you learn the mechanical controls, but paint is needed to evaluate actual atomization and coverage.
Choosing and Preparing Airbrush Paint
Not every model paint is ready to spray directly from the bottle, and not every paint described as “acrylic” uses the same thinner.
Airbrush-Ready Paints
Some paint ranges are specifically formulated for airbrushing. They may work directly from the bottle under the manufacturer’s suggested conditions, though small adjustments may still be appropriate for the equipment and environment.
For a first session, a quality paint intended for airbrushing can remove one variable from the learning process.
Brush Paints Used in an Airbrush
Many conventional hobby paints can also be airbrushed when properly prepared. However, some require significant thinning and others are not appropriate for spraying at all.
Check the manufacturer’s guidance before attempting to spray a product designed for another application method.
Thinner Is Not One-Size-Fits-All
Use the thinner recommended for the specific paint line. Water may be appropriate for some water-based acrylics, while alcohol-based acrylics, enamels, and lacquers can require quite different products.
Mixing incompatible thinners and paints may cause clumping, poor adhesion, unexpected drying, or damage to your airbrush and the model’s finish.
There is no universal paint-to-thinner ratio. Even colors within the same paint line can behave somewhat differently.
A Reliable Mixing Routine
- Shake or stir the paint as directed, distributing the pigment evenly.
- Put a small amount in a separate mixing cup when practical.
- Add a little manufacturer-approved thinner only if needed.
- Mix thoroughly and remove visible dried fragments or debris.
- Put a small amount into the airbrush cup.
- Spray a test pattern on spare primed plastic and adjust one variable at a time.
The goal is a consistent fine mist, not a specific appearance in the mixing cup. A “milk-like” consistency can be a rough visual comparison, but it is not a substitute for the product instructions and a real spray test.
Air Pressure, Spraying Distance, and Paint Flow
Three settings work together whenever you spray: pressure, distance, and paint flow.
Air Pressure
Air pressure helps atomize paint. If pressure is too low for a particular mixture, the spray may sputter or produce coarse droplets. Excessive pressure can increase overspray, blow paint away from the target, or cause wet paint to spread.
As an example - not a universal rule - some hobby airbrush paint guidance recommends working in the 15–25 PSI range. Many beginners begin testing at around 15–20 PSI for compatible paint and equipment, then adjust as needed.
Use the airbrush and paint manufacturer’s recommendations first. Different airbrushes, nozzle sizes, pigments, primers, and effects can require substantially different settings.
Where practical, check pressure while airflow is running; some regulators display a different reading when the trigger is idle.
Distance From the Model
A greater distance generally produces a wider, softer spray pattern and can increase the chance of paint drying before it reaches the surface. Moving closer produces a narrower pattern but increases the risk of concentrated wet paint.
For broad practice coats, a distance of several inches may be a reasonable place to start. Fine lines often require moving closer and reducing paint flow, sometimes with a different pressure and paint consistency.
There is no single correct distance for every airbrush. Watch the pattern on your test surface and adjust to what the paint actually does.
Trigger Travel and Hand Speed
Pulling the trigger farther back releases more paint on most dual-action airbrushes. Moving your hand too slowly puts more material into one area.
For your first models, favor less paint and a steady hand movement. Build the color in several passes instead of trying to make it opaque immediately.
Quick Adjustment Guide
| What You See | First Thing to Check | Likely Adjustment |
|---|---|---|
| Coarse sputtering | Nozzle cleanliness and paint viscosity | Clean tip; check mix and pressure against product guidance |
| Paint spidering or running | Too much wet paint for the distance | Reduce trigger pull, move a little farther away, or adjust pressure appropriately |
| Dry, dusty texture | Paint drying before it lands | Reduce excessive distance; reassess airflow, thinner, and ambient conditions |
| Wide overspray | Distance, pressure, and trigger pull | Move closer for detail, reduce paint flow, and refine settings |
Your First Practice Session: Lines, Dots, and Even Coats
Before painting a model you’ve spent hours assembling, give yourself a practice session.
A piece of primed plastic sheet, an unused kit part, or an inexpensive test model is ideal. Paper can help you understand trigger timing, but paint often behaves differently on absorbent paper than on styrene.
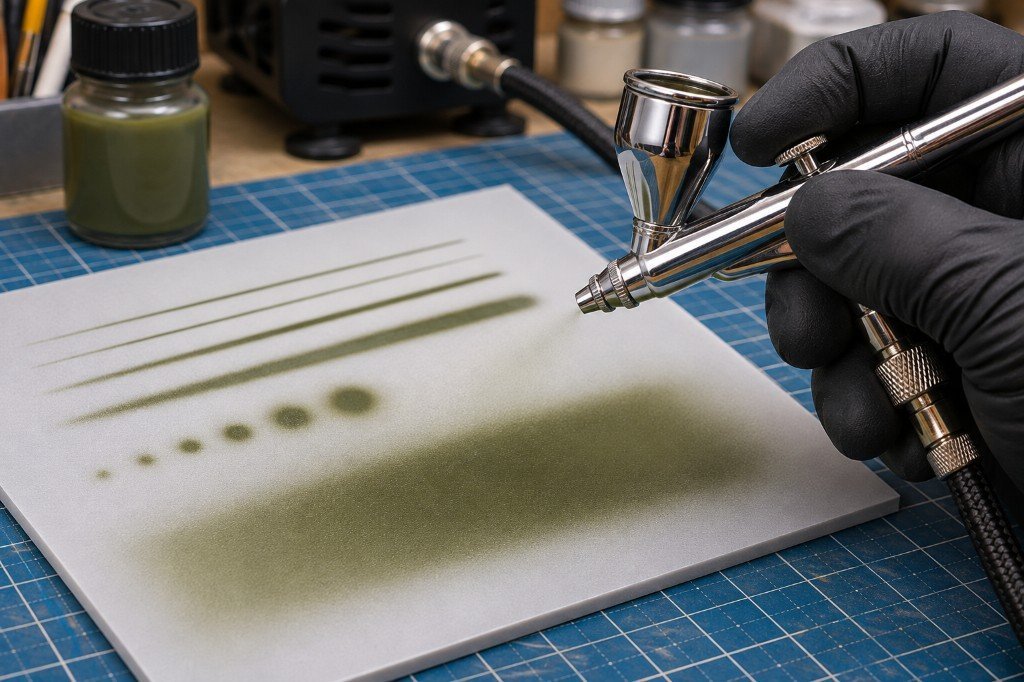
Exercise A - Straight Lines
Move the airbrush steadily from left to right while applying a small amount of paint. Practice starting the paint after movement begins and stopping it before movement ends.
Try to make several parallel lines with a similar width and density. Do not worry about producing extremely fine lines.
Exercise B - Dots
Aim at a spot, introduce a tiny amount of paint, then turn the paint off. Move to a new spot and repeat.
If each dot becomes a large wet blob or grows little branching legs, reduce how much paint reaches the surface and revisit your distance and settings.
Exercise C - A Broad, Even Panel
Spray a light stripe across a test piece. Make the next pass overlap the previous pass slightly and continue until the area has a reasonably even color.
Let the coat dry as directed and repeat if necessary. You should still be able to see the plastic’s surface detail.
Exercise D - Change One Variable
Repeat a similar pass after changing just one thing: distance, pressure, or trigger pull. Compare the pattern and note which change helped.
Prepare and Position Your Model
Airbrushing doesn’t fix construction defects. It often makes them more apparent once a uniform color covers the surface.
Check seams, mold lines, glue marks, fingerprints, and sanding residue. Clean the surface appropriately and let it dry completely.
Use primer where the paint system or material calls for it, and allow the primer to cure according to its instructions. Mask transparent parts, finished interiors, or areas that need to remain unpainted.
A Secure Model Holder Helps
A turntable, painting stand, or temporary handle lets you rotate the model without touching wet paint. If a component is difficult to reach after assembly, paint it separately when practical.
Plan the order of surfaces so you don’t have to reach across a freshly sprayed area. For example, on a tank hull you might spray the underside or hard-to-access recesses first, then move to the broad upper and side surfaces.
Applying Your First Smooth Base Coat
A simple, single-color base coat is the best first project for learning airbrush control.
Imagine a 1/35-scale military vehicle that will be painted olive drab. The same sequence works for many aircraft, ships, and science-fiction kits.
Step 1 - Mix and Test the Paint
Mix your paint as directed, thin only if needed, and check the spray pattern on a spare part. Confirm that the airbrush sprays evenly before moving toward the model.
Step 2 - Start With a Light Pass
Keep the airbrush moving. Introduce the paint gently and apply a thin, controlled pass over one area.
The first pass does not have to hide the primer completely.
Step 3 - Overlap Consistently
Make the next pass overlap the previous one slightly. Keep your distance and hand speed reasonably consistent while you cover the main surface.
Work in manageable sections rather than chasing every small corner at once.
Step 4 - Rotate the Model
Turn the model so you can reach side panels, recesses, and edges with an appropriate spray angle. Watch for wet paint accumulating near corners, grille openings, and raised details.
Step 5 - Let the Coat Set
Stop if the surface begins looking excessively wet. Allow the paint to dry for the interval specified by its manufacturer before the next pass or coat.
Step 6 - Build Coverage Gradually
Apply additional light passes until the color appears even. Some paints and colors require several passes. That’s normal, and it is safer for the detail than a thick, hurried coat.
Step 7 - Inspect Under Good Light
Look for missed spots, rough overspray, runs, dust, and paint building around detail. Correct problems only after the coating is ready for the required treatment.
Masking, Camouflage, and Narrower Spray Patterns
Once you’re comfortable with a basic coat, you can begin experimenting with more precise painting.
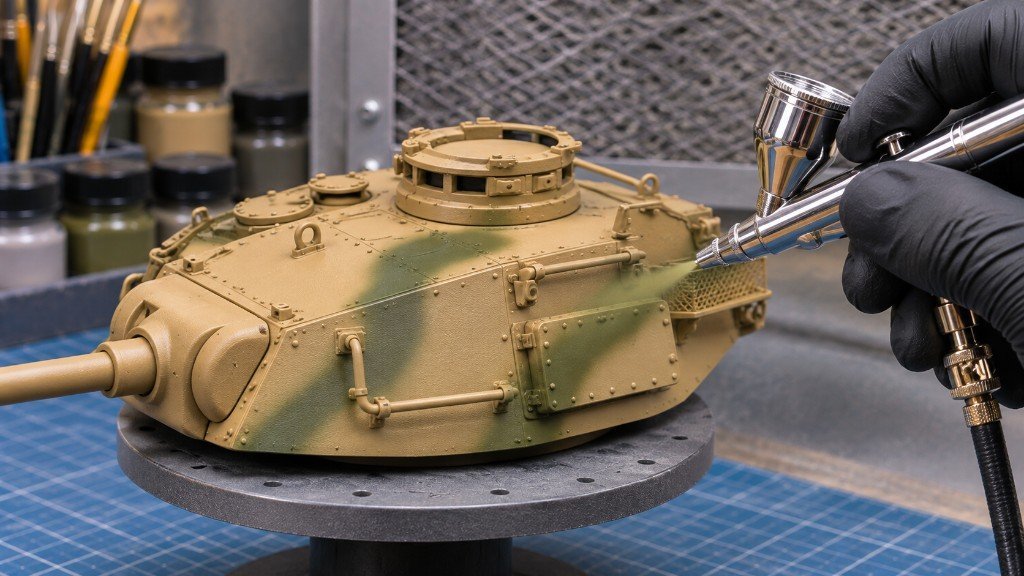
Hard-Edged Camouflage
Use suitable low-tack hobby masking tape or masking material over a fully cured first color. Make sure tape edges sit securely without pressing so hard that you damage delicate parts.
Apply the second color in light passes. Avoid directing a heavy wet spray under the mask edge.
Remove the mask carefully at a time compatible with the products you’re using. If paint lifts, stop and investigate adhesion and curing before continuing.
Soft-Edged Camouflage
Soft transitions are created with a controlled spray pattern rather than a hard mask. Move closer to the model, reduce the amount of paint released, and test a suitable pressure and paint consistency for finer work.
Keep the airbrush moving. Excessive paint delivered at close range can make the color run outward into spider-like patterns.
You don’t need to master freehand camouflage immediately. Masked patterns are a perfectly good way to build confidence.
Keep the Subject’s Scale in Mind
A very wide, fuzzy edge can look oversized on a small 1/72 aircraft even though it may look attractive on a large practice board.
Test the pattern at the actual scale of your model before spraying the final colors.
Avoid Common First-Time Technique Mistakes
Good airbrushing is largely about developing predictable habits.
Don’t flood the surface. If a coat is visibly pooling, adding more paint will not fix it. Let it dry and correct it later.
Don’t chase complete coverage immediately. A transparent first pass is often exactly what you want. Build color gradually.
Don’t hold the nozzle in one spot. This concentrates material and can create runs or a rough circular patch.
Don’t spray too far away just to stay safe from runs. Excessive distance may cause paint to dry in the air and leave a dusty texture. Adjust paint flow and technique instead.
Don’t assume a higher PSI always cures sputtering. A dirty nozzle, dried paint on the needle, or incompatible thinning can be the real cause.
Don’t rush masking or overcoating. Paint that feels dry may not be sufficiently cured for tape, another paint system, or a clear coat.
Don’t abandon the brush. Paintbrushes remain useful for touch-ups and details after the airbrushed base color is complete.
Cleaning Between Colors and After Painting
An airbrush works best when paint doesn’t have a chance to harden inside its nozzle and paint passages.
Cleaning is part of every painting session, not something to do only after the airbrush stops working.
Between Colors
- Empty any remaining paint according to the manufacturer’s instructions.
- Wipe the cup with a suitable lint-free material when appropriate.
- Add a compatible cleaner or rinse liquid for that paint system.
- Flush into a suitable spray-out container while using the appropriate ventilation and protection.
- Repeat as necessary until the remaining color is removed.
- Make a quick test spray before adding the next color.
At the End of the Session
Follow the airbrush maker’s cleaning instructions. Depending on the model, this may include removing and carefully wiping the needle, cleaning the cup and paint passage, and inspecting the nozzle area.
Needles and nozzles are delicate. Never force a needle into a clogged nozzle or over-tighten a small threaded component.
If a deep clean is required, follow the exact procedure for your airbrush. Some parts tolerate certain cleaners, while seals or finishes may not. Do not soak the entire airbrush in solvent.
What About Tip Dry?
Some paints gradually build up on the exposed needle tip, reducing flow or causing intermittent sputtering. This is often called tip dry.
If it occurs, stop spraying and clean the tip using a product-compatible method recommended for your airbrush. Avoid touching or bending the exposed needle point.
A manufacturer-approved flow improver or drying retarder can sometimes help with a specific paint formulation, but don’t add one indiscriminately to every paint.
Common Airbrushing Problems and How to Fix Them
Even experienced modelers occasionally deal with an airbrush that behaves badly. Start with the simple checks before taking the equipment apart.
| Problem | Possible Cause | What to Do |
|---|---|---|
| Spattering or coarse droplets | Dried paint on tip, poor atomization, thick paint, or unsuitable pressure | Check the needle tip, mix, and recommended pressure; clean before testing again |
| No paint, but air is flowing | Blocked nozzle, insufficient paint flow, loose needle chuck, or incorrect setup | Check the cup, trigger movement, connections, and nozzle using the airbrush manual |
| Spidering or paint running outward | Too much wet paint at close range, sometimes with excessive airflow | Reduce paint flow, adjust distance/pressure, and apply lighter passes |
| Dry, dusty or grainy finish | Paint drying before reaching the model, poor atomization, or excessive distance | Test closer spraying, compatible thinning, and appropriate pressure and conditions |
| Orange-peel or pebbled texture | Uneven application, paint viscosity, atomization, or coating behavior | Test mixture and spray setup; correct only after coating has cured appropriately |
| Paint stops and starts | Tip dry, partial blockage, inconsistent paint, or fluctuating air supply | Clean the tip, inspect the nozzle, check paint preparation and air pressure |
| Bubbles in the paint cup | Possible nozzle/head seal problem, blockage, or damaged component | Stop spraying; inspect and service components according to the airbrush manual |
| Unexpected water droplets | Condensation in the air supply or moisture trap problem | Drain and inspect the moisture trap/compressor as instructed; test before continuing |
| Paint lifting with masking tape | Inadequate adhesion, incompatible materials, or incomplete curing | Stop, correct the affected area, and verify surface prep and cure time |
| Heavy overspray around fine lines | Too much paint, distance, or airflow for the desired pattern | Use less trigger travel and test a closer, more controlled setup |
The Best Troubleshooting Sequence
Stop, test, inspect, and change one variable. Begin with paint in the cup, clean tip/nozzle, secure hose, steady airflow, and compatible paint mixture. Only then move to more complicated diagnosis or disassembly.
Don’t automatically dismantle the entire airbrush for every imperfect spray pattern. Unnecessary disassembly can damage small parts and introduce new problems.
Frequently Asked Questions
Do I need an expensive airbrush to get started?
No. Consistent airflow, a dependable trigger, a suitable nozzle, available replacement parts, and good cleaning habits matter more than premium features. A modest but serviceable airbrush can teach you the skills you’ll use for years.
Is 20 PSI the correct pressure for every model paint?
No. It can be a reasonable starting experiment for some paints and airbrushes, but pressure depends on the product, nozzle, thinning, distance, and desired result. Follow manufacturer guidance and confirm the spray pattern on a test surface.
How much thinner should I add?
There is no universal ratio. Some airbrush-ready paints spray without thinner, while others need a compatible product in a specific amount. Start with the manufacturer’s instructions and adjust in small steps only after testing.
Can I use water to thin acrylic paint?
Sometimes. Some water-based acrylic paints permit water, but many products labeled acrylic require a particular thinner for reliable spraying. Never assume water works for every acrylic, lacquer, or enamel system.
Why does paint dry on the needle tip?
Some formulations dry quickly at the exposed needle, particularly during long sessions or with fine nozzles. Clean tip buildup safely and check product-approved thinner or flow improver options. Keep the equipment and paint system consistent while troubleshooting.
Do I need an airbrush booth if I’m spraying water-based paint?
You still need a suitable way to control airborne paint mist. Water-based paint produces spray droplets that should not be inhaled. Choose appropriate ventilation and protection based on the actual product and spraying conditions.
Can I airbrush primer and clear coats?
Yes, if the specific primer or clear coat is intended for airbrush application and compatible with your model and underlying paint. Follow product-specific thinning, pressure, ventilation, drying, and curing instructions.
Do I need to learn freehand camouflage right away?
Not at all. Start with a smooth single-color coat. Masked two-color schemes are a logical next step. Freehand soft-edge camouflage becomes easier after you’ve practiced trigger control and distance.
How often should I clean the airbrush?
Flush appropriately between color changes and complete the manufacturer’s end-of-session cleaning routine after painting. If the spray becomes inconsistent, inspect for tip dry or blockages before continuing.
Your First Airbrushing Session Checklist
Before you paint your next model, check the following:
- I have read the paint, thinner, and airbrush instructions.
- My spray area, ventilation, and respiratory protection are suitable for these products.
- My compressor, regulator, moisture trap, hose, and fittings are ready.
- My airbrush is clean and operating properly.
- I have a holder for the model and a separate practice surface.
- The model has been cleaned, inspected, primed if needed, and masked where appropriate.
- My paint is thoroughly mixed and uses only compatible thinner if thinning is needed.
- I have tested pressure, distance, and paint flow on spare plastic.
- I can start and stop paint without leaving a large blob.
- I am applying light, overlapping passes instead of one heavy coat.
- I have allowed the paint to dry and cure as the manufacturer directs.
- I have cleaned the airbrush and handled waste safely after the session.
You don’t need perfect camouflage or ultra-fine lines to pass this checklist. A clean, repeatable base coat is a genuine accomplishment.
Final Thoughts: Build Control Before Complexity
Your first airbrushing session may not look like the flawless finishes you see in contest galleries, and that’s completely normal. The goal is to learn the relationship between air, paint, distance, and movement.
A dependable setup and a few simple habits will carry you a long way: prepare the surface, choose compatible paint, test the spray, keep the airbrush moving, build light coats, and clean the equipment before paint dries inside it.
Once you can apply a smooth base coat consistently, finer details, camouflage patterns, subtle shading, and specialized finishes will become much easier to explore.
Happy modeling!
— Duneland Model Club
Continue Learning
These guides cover the surface preparation, basic color application, and hand-painted detail work that complement airbrushing.