Primer: Why It Matters and How to Use It
A Great Paint Job Starts Before the Paint
You’ve carefully assembled your model, cleaned up the seams, added a few aftermarket details, and you’re finally ready to start painting.
But before reaching for your favorite color, there’s one important step worth considering: primer.
Primer may not be the most exciting part of building a scale model, but it can make a significant difference in the quality and durability of the finished paint job. A properly applied primer coat helps paint adhere to the surface, creates a consistent foundation for your colors, and reveals construction imperfections while they’re still easy to fix.
Whether you’re building a 1/72 aircraft, a 1/35 military vehicle, a competition-quality automobile, or a miniature figure, understanding how primer works will help you achieve more consistent results.
The good news? Priming is straightforward once you understand the basics.
What Is Primer?
Primer is a preparatory coating applied to a model before its main color coats.
Unlike ordinary model paint, primer is formulated primarily to prepare the underlying surface and provide a suitable foundation for subsequent layers.
Depending on the product, primer can improve adhesion, create a more uniform surface, and help reveal or smooth minor imperfections.
Think of primer as the foundation of a house. A beautiful paint finish is much easier to achieve when the surface underneath is properly prepared.
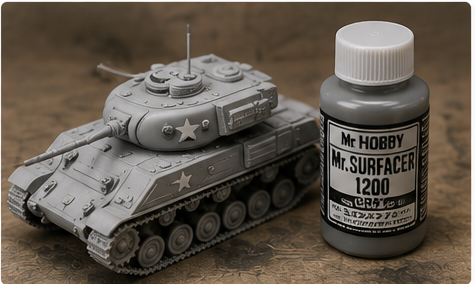
The Four Main Benefits of Priming
1. Better Paint Adhesion
Plastic, resin, and metal can be challenging surfaces for certain paints.
Some water-based acrylic paints, in particular, may have difficulty adhering reliably to smooth, untreated plastic.
Primer provides a surface designed to help subsequent paint layers bond more securely. This becomes especially important when masking camouflage patterns, handling the model during assembly, or applying additional finishing products.
Primer is not a guarantee against paint lifting, but the right primer on a properly prepared surface can significantly reduce the risk.
2. Consistent Color Coverage
A model may contain several different materials and colors before painting:
- Gray or white injection-molded plastic
- Putty used to fill gaps
- Sanded and repaired areas
- Brass photo-etched details
- Resin replacement components
Painting directly over these different surfaces can produce uneven coverage or visible color variations.
A consistent primer coat brings everything closer to a common starting point.
This is particularly useful when applying lighter colors such as white, yellow, or red.
3. Revealing Surface Imperfections
One of primer’s most valuable jobs is helping you find problems.
A thin coat of gray primer can reveal flaws that were difficult to see on bare plastic, including seams, sanding scratches, glue marks, and small gaps.
This makes primer an inspection tool as well as a painting product.
Instead of discovering a seam after applying camouflage and clear coats, you can correct it before the main painting begins.
4. Controlling the Appearance of Your Paint
The color underneath your paint can influence how the final color appears.
For example, yellow applied over white primer will generally appear brighter than the same yellow applied over black primer.
Dark primer can also be used intentionally to create shadows and depth.
Choosing your primer color is therefore part of planning the final finish.
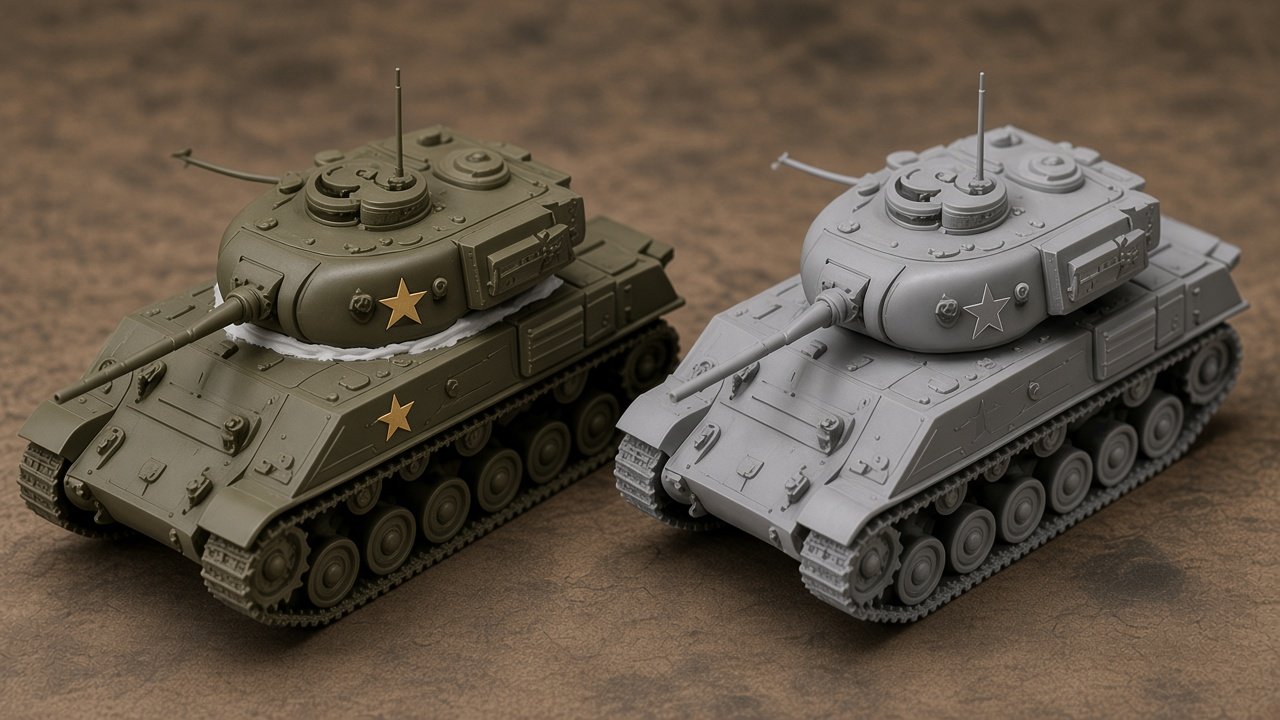
A Useful Distinction: Primer Versus Surfacer
You’ll often see products labeled primer, surface primer, or surfacer.
These terms overlap, but they don’t always describe identical products.
A fine surface primer is primarily intended to establish a smooth, suitable undercoat. A filling surfacer is intended to help address small scratches or surface irregularities and may be designed for sanding.
Some products perform both jobs.
Always check the manufacturer’s description rather than assuming every primer has the same filling, adhesion, or sanding properties.
Do You Really Need to Prime Every Model?
Not necessarily.
Some model paints adhere well to clean polystyrene without a separate primer. There are also situations where adding an unnecessary coating offers little benefit.
However, priming is generally a good idea when:
- Your model contains resin, metal, putty, or several different materials.
- You plan to use masking tape for camouflage or markings.
- You’re applying water-based acrylic paints that benefit from an undercoat.
- The model has been extensively filled, sanded, or modified.
- You’re painting light colors over dark plastic.
- You’re preparing a smooth, consistent surface for a demanding finish.
You may reasonably skip primer on some small, low-handling parts or when using a paint specifically designed to adhere directly to the material.
If you’re unsure, test your chosen paint and primer combination on a spare part or leftover sprue.
Choosing the Right Type of Primer
There are several categories of hobby primer. The best choice depends on your model’s materials, the paint you intend to use, your application equipment, and your working environment.
Fine Surface Primers
Fine surface primers are especially useful for models with delicate surface detail.
They are designed to produce a relatively smooth, thin coating while preserving panel lines, rivets, and molded textures.
These are excellent general-purpose choices for most aircraft, armor, automotive, and ship models.
Water-Based Acrylic Primers
Many modern hobby primers use water-based acrylic or acrylic-polyurethane formulations.
Depending on the particular product, they may be suitable for airbrush application, brush application, or both.
They are convenient for modelers who prefer water-based painting systems and want to avoid the stronger solvent odors associated with lacquer products.
However, water-based does not mean that an atomized spray is safe to breathe. Proper ventilation and appropriate respiratory protection still matter.
Some water-based primers also require additional curing time before they develop their best adhesion or become suitable for sanding and masking.
Lacquer-Based and Other Solvent-Based Primers
Lacquer-based primers are popular among experienced modelers because many offer excellent adhesion, smooth application, and good sanding characteristics.
They are particularly useful for preparing surfaces where a refined finish is important.
However, their solvents can damage sensitive plastics or existing coatings if applied too heavily.
They also require more stringent attention to ventilation, respiratory protection, flammability, and equipment compatibility.
Use only the recommended thinner when applicable, and test unfamiliar combinations before spraying your model.
Filling Surfacers
Filling surfacers are useful after construction and repair work.
They can help address fine sanding marks and minor surface defects, but they are not substitutes for properly filling gaps or correcting poorly aligned parts.
Some surfacer ranges offer different grades, from relatively coarse filling products to finer finishing products.
For models with delicate engraved detail, start with an appropriately fine product.
Specialty Primers
Metal, flexible plastics, certain resins, and other unusual materials may require a specific adhesion primer.
For example, photo-etched brass can be more difficult to paint than styrene plastic.
A primer specifically intended for metal can provide better results than assuming a general-purpose primer will work equally well on every surface.
Always check material compatibility.
What Color Primer Should You Use?
Primer color can affect both your painting process and your final results.
There is no universally correct choice. It depends on the subject, the intended finish, and how much influence you want the undercoat to have.
| Primer Color | Best Uses | What to Expect |
|---|---|---|
| Gray | General-purpose priming, aircraft, armor, and most everyday projects | A neutral starting point that makes surface flaws easier to identify |
| White | White, yellow, orange, bright colors, and many light finishes | Helps bright colors retain their brightness and reduces the need for heavy coverage |
| Black | Dark finishes, metallic painting systems, and shadow effects | Provides a darker foundation that can create depth or affect metallic appearance |
| Red Oxide / Red Brown | Armor, rusty surfaces, and weathering-oriented finishes | Provides a useful reddish-brown foundation for certain subjects and painting effects |
| Pink | Selected red and yellow finishing techniques | Can provide a warmer foundation, depending on the paint and desired result |
A Few Practical Examples
Painting a yellow aircraft: White primer is often an excellent starting point. Yellow paint can be relatively transparent, and a light foundation helps produce more consistent coverage.
Painting a military vehicle: Gray primer is a versatile choice. Red-brown primer can also be useful when you plan to incorporate worn primer or rust-colored effects into your weathering.
Painting a polished metallic aircraft: Surface smoothness becomes especially important. Some metallic systems work best over a glossy black undercoat, while others recommend gray or another foundation. Follow the requirements of the specific metallic paint.
Painting a bright red automobile: White or pink primer may help achieve the desired brightness and warmth.
Preparing Your Model Before Priming
Even the best primer cannot compensate for an improperly prepared surface.
Take a few minutes to check your work before opening the primer bottle or spray can.
Step 1: Finish the Major Assembly Work
Inspect the model for:
- Visible joints and gaps
- Mold lines and flash
- Ejector-pin marks in visible areas
- Glue residue or fingerprints
- Scratches left by sanding
- Poorly fitted replacement parts
Correct these problems before applying primer.
A primer coat may hide extremely fine imperfections, but it won’t make a large seam or uneven joint disappear.
Step 2: Clean the Surface
Dust, grease, fingerprints, and other contaminants can interfere with adhesion.
For suitable, unpainted plastic parts, a gentle wash with mild dish soap and water is often an effective cleaning method.
Rinse thoroughly and allow the parts to dry completely.
Use extra care with delicate assemblies, previously painted areas, electrical components, and parts that could be damaged by immersion.
Resin parts may require particular attention to cleaning because residues from manufacturing or handling can interfere with coatings.
When sanding resin, avoid creating airborne dust. Wet-sanding methods and appropriate precautions help reduce exposure.
Step 3: Mask Areas That Should Not Receive Primer
Before spraying, protect areas such as:
- Clear canopy glazing and windows
- Transparent lenses
- Certain moving or closely fitted joints
- Critical locating surfaces
- Areas intentionally reserved for later assembly or bonding
Primer can affect tight-fitting parts and may interfere with adhesive bonding.
Plan ahead so you aren’t forced to scrape primer from delicate details later.
Step 4: Mount or Hold the Model Securely
A stable painting setup makes a noticeable difference.
Use a suitable painting handle, stand, clip, or temporary mount so that you can reach the intended surfaces without touching the freshly primed areas.
For complicated kits, priming subassemblies separately may be more practical than trying to coat the fully assembled model.
A Safety Check Before You Spray
Spraying primer creates airborne droplets, even when the product is water-based.
Some products also release hazardous solvent vapors and may be flammable.
How to Apply Primer
Primer can be applied in several ways. Each method has advantages.
Method A: Using a Spray Can
Spray-can primer is convenient, requires no airbrush, and can cover larger models relatively quickly.
The main challenge is controlling how much material reaches the surface.
- Prepare the spray can. Shake the can thoroughly according to the manufacturer’s instructions. Make a short test spray onto a suitable test surface to check the pattern.
- Position the model. Place the model on a secure holder in your designated spray area. Many hobby aerosol products are applied from roughly 8–12 inches (20–30 cm), but the correct distance varies. Follow the instructions on your particular can.
- Apply a light first pass. Begin spraying just before the spray pattern reaches the model. Move smoothly across the surface, keeping the can moving rather than concentrating on one spot. Release the spray after passing beyond the model. Your first pass should be light. Complete coverage is not necessary immediately.
- Build coverage gradually. Allow the first pass to settle or dry as directed, then apply another light pass if needed. Rotate the model to reach different surfaces. A few controlled passes are generally preferable to one heavy application.
- Stop before the details disappear. Watch panel lines, rivets, grilles, and raised features. If primer begins collecting around details or running down the surface, you’re applying too much. Let the coating dry. Do not attempt to repair a wet run by rubbing it with your finger.
Method B: Using an Airbrush
An airbrush provides excellent control over how much primer is applied and where it goes.
This can be particularly helpful on highly detailed aircraft, armor, figures, and small-scale subjects.
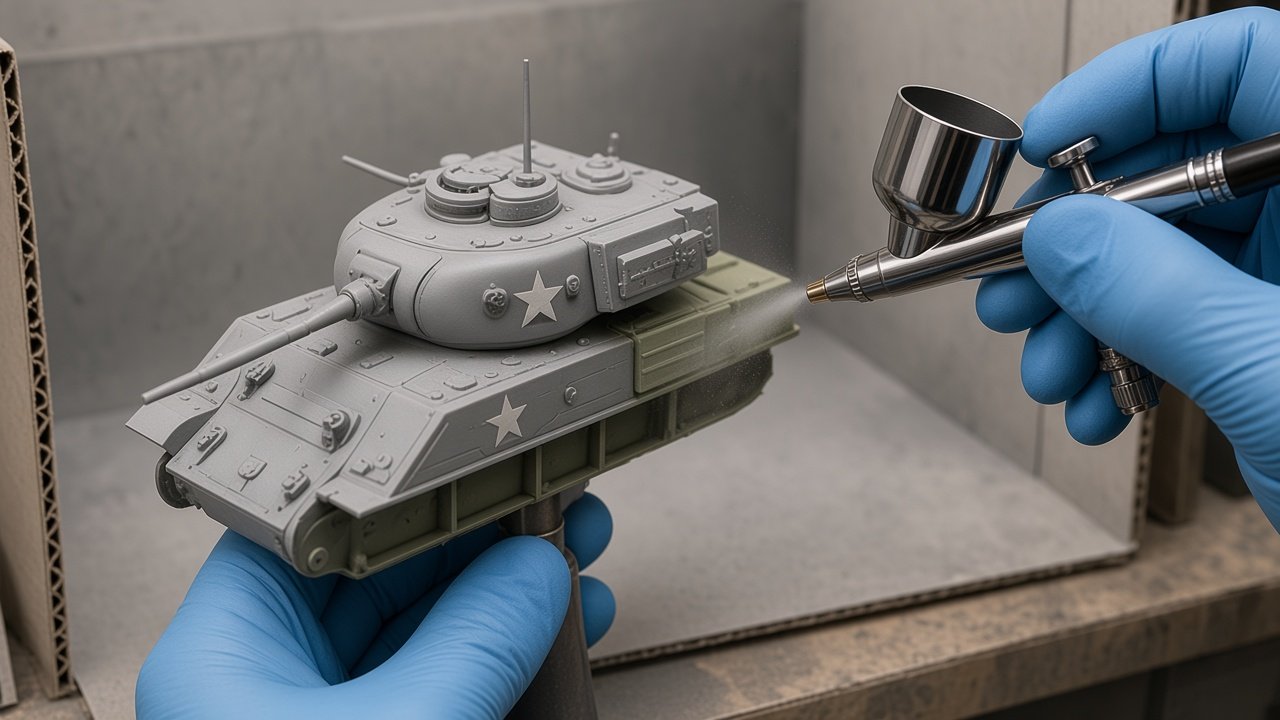
- Select an airbrush-compatible primer. Not every bottled primer is suitable for spraying. Check that the product is intended for airbrush application.
- Prepare the primer. Mix or shake the primer as instructed. Some products can be sprayed directly from the bottle. Others require thinning. If thinning is necessary, use the manufacturer’s recommended thinner. Do not assume water or a general-purpose thinner is suitable for every primer.
- Set your air pressure. Start with the manufacturer’s recommended setting. As one example, many water-based hobby primers are used around 15–20 PSI, although the correct pressure depends on the formulation, airbrush, needle size, and spraying distance. Test the spray pattern before approaching the model.
- Apply thin, controlled passes. Keep the airbrush moving and apply a light, even coat. Work around the model gradually rather than trying to achieve complete coverage in one pass. If the surface becomes glossy and wet from accumulated primer, reduce the amount being applied.
- Allow the coats to dry as directed. Apply additional light coats only when appropriate for the product. The goal is a smooth, continuous primer layer without obscuring detail.
- Clean your airbrush promptly. Primer can be difficult to remove once dried inside an airbrush. Follow the manufacturer’s cleaning instructions and use a compatible cleaning product.
Method C: Applying Primer With a Brush
You do not need an airbrush or spray can to prime every model.
Some hobby primers are specifically formulated for brush application.
For these products, use a suitable brush and apply thin, even coats.
Avoid repeatedly brushing over areas that have begun to dry. Doing so can disturb the coating and leave visible marks.
Allow each coat to dry before deciding whether another is necessary.
Brush application is especially useful for small details, figures, isolated repairs, or situations where spraying is impractical.
It may be more challenging to achieve a perfectly smooth finish on large surfaces, particularly with products not designed for brushing.
How Much Primer Is Enough?
One of the most common beginner mistakes is applying too much primer.
A good primer coat should provide a suitable, reasonably uniform foundation without sacrificing the model’s surface detail.
Look for these signs:
- The intended surfaces have been covered evenly enough for the next painting stage.
- Panel lines remain visible and clean.
- Fine rivets and surface textures remain distinct.
- There are no runs, puddles, or thick edges.
- The coating appears smooth rather than dusty or heavily textured.
You do not always need a completely opaque coating.
A slightly uneven-looking color can be acceptable if the coating is thin, properly adhered, and suitable for your next step.
Let the Primer Dry—and Cure
Drying and curing are not necessarily the same thing.
A primer can feel dry to the touch before it has developed its intended hardness and adhesion.
The time required depends on the product, coat thickness, temperature, humidity, and other conditions.
Some water-based primers require approximately 24 hours to reach their more fully cured state. Other formulations have different timelines.
Always follow the manufacturer’s instructions for recoating, handling, sanding, masking, and painting.
If a primer is still soft or tacky, don’t immediately apply the next coat and hope the problem disappears.
Allow additional time and investigate the cause.
For hobbyists who prefer to avoid rushing, priming one day and beginning the next stage on a later session is often a practical routine—provided it meets the product’s requirements.
Inspecting and Correcting the Primed Surface
Once the primer has cured sufficiently, examine the model under good lighting.
A single-color undercoat makes many construction problems easier to spot.
Slowly rotate the model and look for:
- Seams that are still visible
- Fine scratches
- Uneven repairs
- Glue residue
- Dust trapped in the coating
- Areas where primer collected too heavily
A light positioned at an angle can help reveal defects that are difficult to see under flat, direct lighting.
Fix Problems Before Applying Your Main Colors
If you find a visible seam or gap, correct it with the appropriate filler or modeling technique.
For small rough areas, a suitably cured and sandable primer may be smoothed with fine abrasive paper or sanding sponges.
Depending on the product and surface, hobbyists may use fine abrasives around 1000–2000 grit or finer for final refinement.
Always check whether your primer is suitable for sanding. Some formulations can peel, roll, or clog abrasives instead of sanding smoothly.
Remove the sanding residue, allow the model to dry if wet-sanded, and apply a light touch-up coat where necessary.
Common Priming Problems and How to Fix Them
Even experienced modelers occasionally have problems with primer.
Most issues can be traced to surface preparation, application technique, environmental conditions, product compatibility, or insufficient curing.
| Problem | Possible Cause | What to Do |
|---|---|---|
| Rough or grainy finish | Primer drying before reaching the model, poor atomization, or excessive spraying distance | Check distance and spray settings. Once fully cured, carefully smooth the surface if the product permits |
| Runs or heavy buildup | Too much primer applied in one area | Stop spraying and let the coating dry. Correct or remove the affected area before repainting |
| Lost panel-line detail | Excessively thick coats | Remove the excess carefully; severe buildup may require stripping the affected coating |
| Primer beading or forming craters | Surface contamination, oils, or incompatible materials | Clean the surface appropriately, test compatibility, and reapply |
| Primer peeling or lifting | Poor adhesion, inadequate preparation, premature masking, or incompatible products | Remove loose material, prepare the surface again, and allow the new coating to cure properly |
| Soft or tacky primer | Incomplete curing, heavy application, or compatibility problems | Allow more time and check product guidance. Do not cover a persistently tacky coating |
| Uneven color | Inconsistent coverage or an underlying material showing through | Apply another light coat if needed; avoid building excessive thickness simply to obtain complete opacity |
The Most Important Troubleshooting Habit
Frequently Asked Questions
Can I use ordinary spray paint as primer?
Some paints are formulated to adhere directly to plastic and may serve as a suitable base coat in certain circumstances.
However, ordinary paint is not necessarily equivalent to a dedicated primer.
General-purpose household or automotive primers also vary considerably. Some are too aggressive for delicate plastics or too heavy for fine model detail.
Use products known to be compatible with your materials, and test them first.
Can I paint acrylic over lacquer primer?
Often, yes.
Once a suitable lacquer primer has fully cured, many acrylic modeling paints can be applied successfully over it.
However, primer and paint formulations vary, so compatibility testing is still advisable.
Can I spray lacquer paint over water-based primer?
Sometimes, but this requires additional care.
Aggressive solvents can damage an insufficiently cured or incompatible underlying coating.
If the products are compatible, allow the primer to cure as directed and begin with light coats rather than a heavy wet application.
Test the combination before using it on your model.
Do I need to prime small parts?
It depends on the part, the material, and how it will be painted or handled.
Small metal details, resin parts, and frequently handled components may benefit from primer.
For tiny plastic details, a separate primer coat may be unnecessary if the selected paint adheres reliably.
Should I sand every primer coat?
No.
If the primer has dried smoothly and the surface is ready for paint, additional sanding may offer little benefit.
Sanding is useful when correcting imperfections or preparing a particularly refined finish.
Unnecessary sanding can remove detail or expose the underlying plastic.
What if I discover a mistake after priming?
Correct it before proceeding.
A visible seam, fingerprint, or rough patch will rarely become less noticeable after adding more paint.
Repair the affected area, clean it, and apply primer again as needed.
Can primer replace a filler or putty?
Not for significant gaps or defects.
Some filling surfacers can help with minor scratches and small irregularities, but visible seams, sink marks, and larger gaps should be repaired properly.
Is primer necessary for clear parts?
Not on areas that need to remain transparent.
Mask clear windows, lenses, and canopy glazing before spraying.
You may prime and paint the opaque framing of a canopy as part of your planned finishing process, while protecting the transparent portions.
A Simple Priming Checklist
Before moving on to your main colors, ask yourself:
- Have I corrected the visible seams and construction defects?
- Is the model clean and completely dry?
- Have I protected clear parts and other areas that should remain unpainted?
- Is my primer compatible with the materials and planned paint system?
- Am I using a safe application environment and appropriate protection?
- Have I applied light coats without obscuring surface detail?
- Has the primer cured sufficiently for the next step?
- Have I inspected the model and corrected any remaining problems?
If you can answer yes to these questions, you’re ready to begin the main painting process.
Final Thoughts: Build a Better Foundation
Primer isn’t a magic solution, and it won’t fix careless construction or poor painting technique.
What it can do is provide a more reliable foundation for the work that follows.
It helps improve paint adhesion, creates a consistent starting surface, and makes it easier to discover imperfections before committing to the final finish.
For a modeler just starting out, learning to apply primer properly is one of the most useful painting skills to develop.
For an experienced modeler, primer is also a valuable inspection and preparation tool—especially when working with mixed materials, extensive modifications, or demanding finishes.
Happy modeling!
— Duneland Model Club